Guardian Settings
The Settings page (
Depending on your deployment type (on-prem or hosted), you may not see every setting in this article represented on your Settings page. For more information on the difference between each deployment type, see Step 1 – Choose Hosting Option.
Tip: Only Guardian administrators can access the Settings page. If you don't have access to this page and believe you should, contact helpdesk@cloudhouse.com.
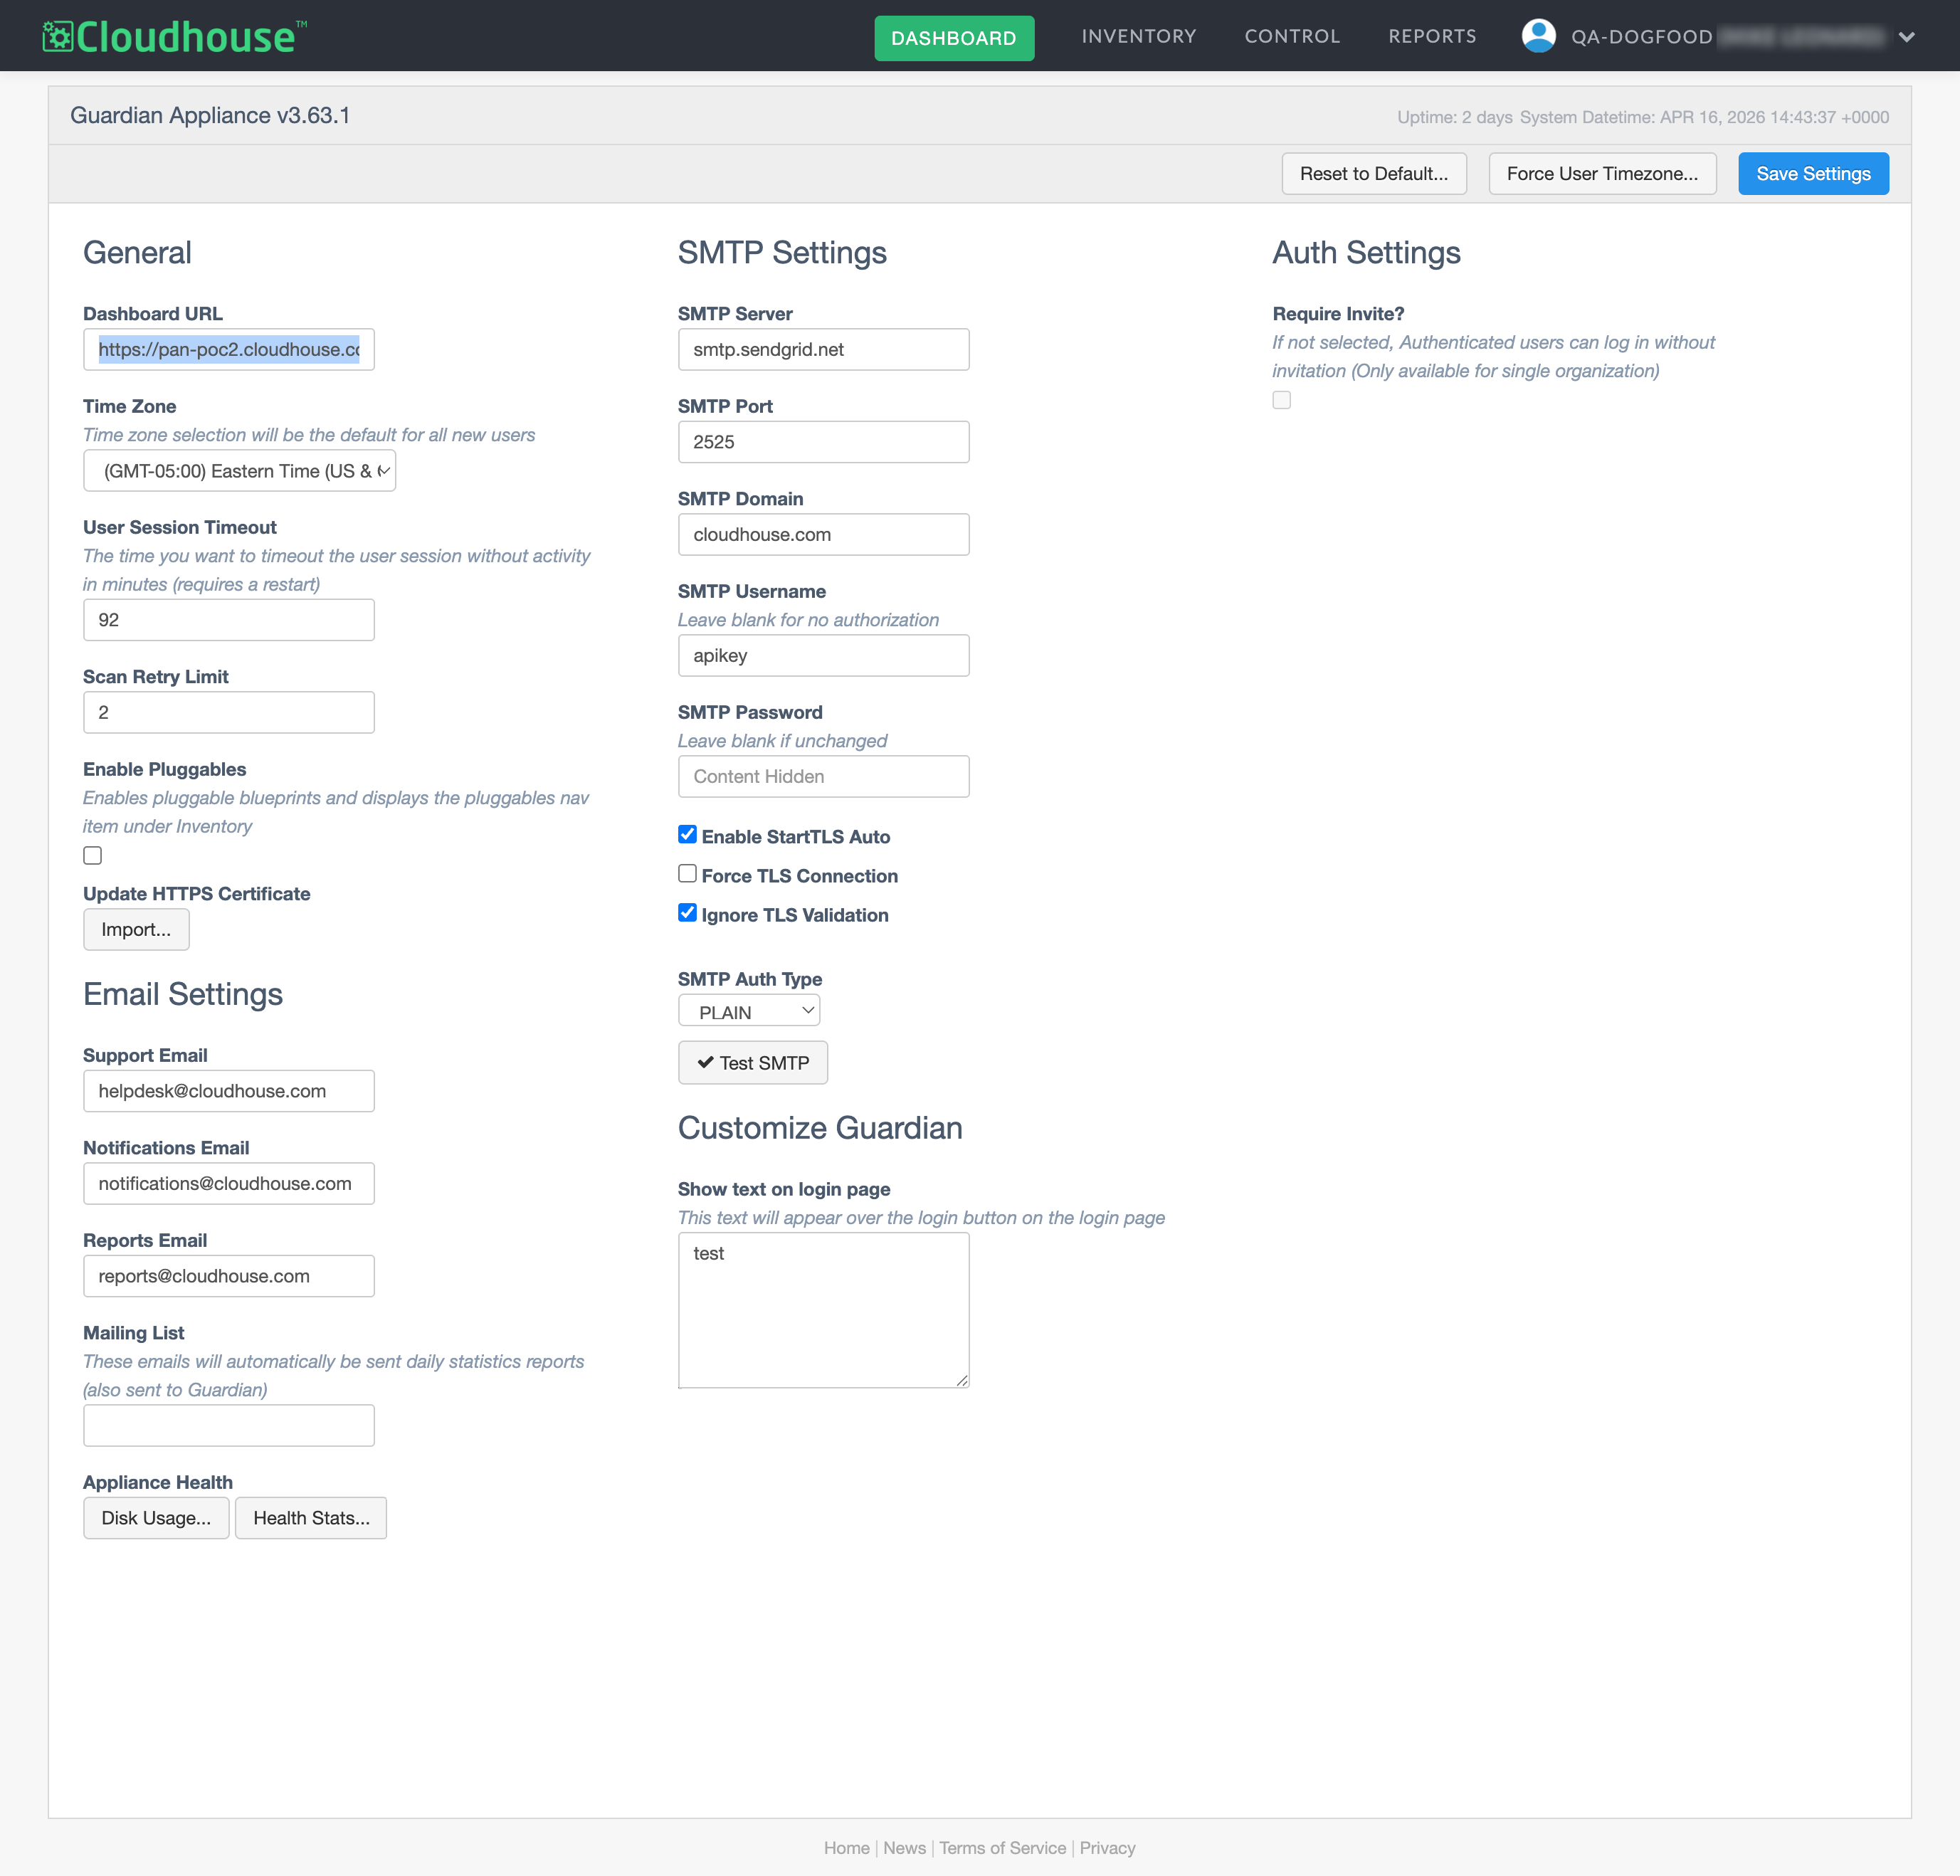
General Settings
Settings in the General category affect the experience of your Guardian users.
Here, the following options are displayed:
| Setting | Description |
|---|---|
| Time Zone drop-down list |
The default time zone for all new users who join your Guardian instance. Users can choose their own time zone when setting up their account. Note: You can enforce a time zone for all users by clicking the Force User Timezone button at the top of the page. This will override the selected time zone for all users in your organization. |
| User Session Timeout field | The number of minutes a user can remain inactive in Guardian before being logged out. |
| Scan Retry Limit field | The number of times Guardian will attempt to scan a node before considering the scan as Failed. |
| Update HTTPS Certificate button On-prem only | Click to import an SSL Certificate and Key file. When a HTTPS certificate expires, you'll need to update it here. |
Once you have made any changes, click the Save Settings button at the top of the page to implement the changes within Guardian.
Email Settings
On-prem only
You can configure Guardian to send automated emails to a specified list of recipients. For example, automated reports and notifications of node scan failure(s). The options under Email Settings ensure proper delivery and to make emails from Guardian easily recognizable to your users. Here, you can also enable daily statistic reports of your Guardian instance by providing a set list of recipients.
Note: These settings work in conjunction with the SMTP settings offered on this same page. For more information, see SMTP Settings below.
Here, the following options are displayed:
| Setting | Description |
|---|---|
| Support Email field |
The email address that is displayed as the sender of support emails. For example, new user invites and password resets. When a new user receives a support email, the email address you provide here is displayed in the From field of that email. |
| Notifications Email field |
The email address that is displayed as the sender of notification emails. For example, scan failure notifications. When a user receives a notification email, the email address you provide here is displayed in the From field of that email. |
| Reports Email field |
The email address that is displayed as the sender of report emails. For example, change reports. When a user receives a report email, the email address you provide here is displayed in the From field of that email. |
| Mailing List field |
The list of recipients that will receive daily statistics reports about your Guardian instance. These reports include information like the number of nodes in your instance, your instance's overall disk usage, and more. Enter as many email addresses here as you'd like, separating them using commas. |
| Disk Usage button | Displays disk usage for your Guardian appliance. This metric can be used to help capacity planning. When clicked, a dialog box is displayed with the disk usage of your Guardian instance. |
| Health Stats button | Displays generic statistics regarding the overall health of your Guardian appliance. When clicked, a dialog box is displayed with the statistics of your Guardian instance. |
Once you have made any changes, click the Save Settings button at the top of the page to implement the changes within Guardian.
SMTP Settings
On-prem only
While the above Email Settings control the addresses used to send emails from Guardian, the SMTP Settings control the logistics of how those emails are sent. Here, you can ensure that your SMTP provider is configured correctly, as well as your email encryption preferences.
Note: It's likely that a member of your organization's IT team has information regarding SMTP settings on-hand. We recommend reaching out to them when configuring the following settings.
Here, the following options are displayed:
| Setting | Description |
|---|---|
| SMTP Server field | The IP address specified by your SMTP provider. |
| SMTP Port field | The port specified by your SMTP provider. |
| SMTP Domain field | The domain specified by your SMTP provider. For example, smtp.gmail.com or smtp-mail.outlook.com. |
| SMTP Username field |
The username of your SMTP provider. If your provider doesn't require authorization, leave this blank. |
| SMTP Password field |
The password for your SMTP provider. If your provider doesn't require authorization, leave this blank. |
| Enable StartTLS Auto checkbox | If selected, emails sent from Guardian are encrypted. If not selected, emails are not encrypted. |
| Force TLS Connection checkbox |
If selected, emails are only sent when a TLS (encrypted) connection is established. If not selected, emails are sent regardless of whether a TLS connection has been established. |
| Ignore TLS Validation checkbox |
If selected, emails are sent without verifying the certificate from the specified SMTP server. If not selected, Guardian will verify the certificate from the specified SMTP server and only send emails if the certificate is valid. |
| SMTP Auth Type drop-down list |
The authentication method used by your SMTP provider. Select the drop-down list to display the following options:
|
If you want to test a configuration before applying the change, click the Test SMTP button. The SMTP Test dialog is displayed. Enter your SMTP details in the appropriate fields, then click Test. Once the test is complete, a confirmation or error message is displayed indicating whether SMTP has been successfully configured or not. If the test is not successful, you can update the SMTP details and try again. If you are unsure of any SMTP settings, we recommend contacting your organization's IT team.
Once you have made any changes, click the Save Settings button at the top of the page to implement the changes within Guardian.
Customize Guardian
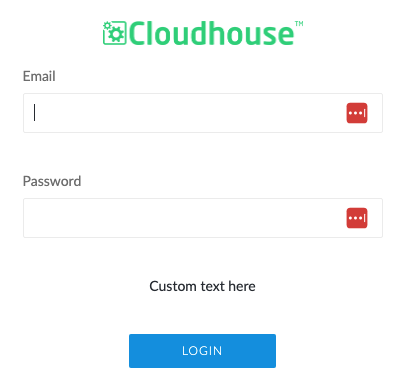
In this section, you can enter custom text to be displayed on the Guardian log in page.
Note: In some cases, you may be able to add additional custom branding to the Guardian log in page such as your own logo or favicon. For more information, contact helpdesk@cloudhouse.com.
Here, the following options are displayed:
| Setting | Description |
|---|---|
| Show Text on Login Page field |
Custom text to be displayed to users on the log in page of your Guardian instance. For example, you might choose to show custom welcome text or reminders about company privacy policies. Tip: The following image offers an example of sample custom text. |
Once you have made any changes to the above settings, click the Save Settings button at the top of the page to implement the changes within Guardian.
Auth Settings
Authentication settings let you determine whether users are required to have an invite before joining Guardian or if they can log in using Single Sign-On (SSO) without first receiving an invitation.
Here, the following options are displayed:
| Setting | Description |
|---|---|
| Require Invite? checkbox |
If selected, new users must receive an invite in order to join your Guardian instance. Note: This setting only applies if Single Sign-On (SSO) is enabled in Guardian. With SSO enabled, users can log in using their existing company credentials without needing to set up an account in Guardian. With this setting enabled, users cannot log into Guardian until they have received an invitation to join an organization. For more information on inviting users, see Invite Users. For more information on SSO, see Single Sign-On. |
Once you have made any changes, click the Save Settings button at the top of the page to implement the changes within Guardian.
Reset Guardian Settings
If you want to reset your Guardian settings at any time, you can do so by clicking the Reset to Default button at the top of the page.
Warning: Resetting Guardian will restore your Guardian instance to its default settings. Any settings configured on this page will be reverted.

Restart Guardian
If you're experiencing issues with your Guardian instance, you can initiate a System Restart by clicking the button at the top of the Settings page.
Warning: This may impact any scheduled node scans or job runs.
